CG Cinematography 第 9 章:合成
- Chapter 9: Compositing - Chris Brejon - Chris Brejon
- https://chrisbrejon.com/cg-cinematography/chapter-9-compositing/
- CG Cinematography Compositing describes the sometimes painful yet necessary cohabitation between lighting and compositing. Walking on eggshells here.
介绍 Introduction
As a lighting artist, I know this is a controversial and sensitive subject. Compositing in a feature CG animation film is quite different to what’s usually called compositing in VFX or just straight up live action.
作为一名灯光艺术家,我知道这是一个有争议且敏感的话题。CG动画电影中的合成与通常所说的VFX合成或直接的实景拍摄有很大不同。
In VFX, it is compulsory since you have to use a film plate to light and comp the shots. But what about animated features ? What would be a proper use of the compositing tool ?
在 VFX 中,这是必需的,因为您必须使用胶片板来照明和合成镜头。但是动画片呢?合成工具的正确用法是什么?
Please keep in mind that I am a lighting artist. I do open Nuke daily and understand how the software works. But this does not make me a compositing artist per se. And remember that I only talk about PBR cartoon movies for Hollywood.
请记住,我是一名灯光艺术家。我每天都会打开 Nuke,了解该软件的工作原理。但这并不能使我成为一名合成艺术家。 请记住,我只谈论好莱坞的 PBR 卡通电影。
为什么要做合成? Why doing compositing ?
I am not trying to start a controversy here. But one may ask this question : since there has been a huge improvement of rendering techniques with PBR and path tracing, why would you want to tweak your renders in a compositing software ? How do we define compositing in the context of a full CG animation film ? I personally see two reasons. The natural division line would be :
我并不是想在这里挑起争论。但有人可能会问:既然 PBR 和路径追踪的渲染技术已经有了巨大的改进,为什么还要在合成软件中调整渲染?在完整的 CG 动画电影中,我们如何定义合成?我个人认为有两个原因。自然的分界线是:
-
Everything that is not achievable by the render engine.
渲染引擎无法实现的一切。
-
All the things we do not have time nor money to do.
所有我们没有时间或金钱去做的事情。
It is all about the desired flexibility later down the pipe. Rule of thumb is the more you leave to compensate in comp, the cheaper the movie will tend to look. Please note the use of the verb “compensate“. If your art direction is based and planned on compositing, like Spiderverse, it may look perfectly fine.
这完全取决于后期所需的灵活性。经验法则是,您在合成中留下的补偿越多,电影看起来就越便宜。 请注意动词“补偿”的用法。如果您的艺术指导基于合成并计划在合成上,例如 《蜘蛛侠:平行宇宙》 ,那么它可能看起来非常好。
I have seen both cultures : some studios just love heavy compositing work to avoid any extra rendering and some VFX supervisors just want to nail it in 3d to avoid any compositing tweaks.
我见识过这两种文化:一些工作室只是喜欢繁重的合成工作,以避免任何额外的渲染,而一些视觉特效主管只想在 3D 中完成它,以避免任何合成调整。
There is probably some middle ground to find here.
这里或许可以找到一些中间立场。
在 3D 中我们“不能”做的事情 What we “cannot” do in 3d
-
Artistic direction. Feast and Spider-man had a massive use of Nuke to get their amazing look.
艺术指导。 Feast 和*Spider-man大量使用Nuke来获得令人惊叹*的外观。
-
Grading. Exposure adjustments, gamma and saturation are generally done in a compositing software.
分级。 曝光调整、伽马和饱和度通常在合成软件中完成。
-
Masking. Not an ideal solution because of stereo compositing but it can be a life saver too.
遮罩。 由于立体合成,这不是一个理想的解决方案,但它也可以挽救生命。
-
Projections. 2d projections on a card or a sphere can be really useful and accurate. A quick setup in Nuke can do miracles.
投影。 卡片或球体上的 2d 投影确实非常有用且准确。在Nuke中快速设置即可创造奇迹。
-
International versions. We avoid rendering the shot for each country if some writing is present. We’d rather use a ST map setup in compositing.
国际版本。 如果存在一些文字,我们会避免为每个国家/地区渲染镜头。我们宁愿在合成中使用*ST 地图*设置。
-
Transitions. Some stylized effects between shots can be asked and should be done in compositing.
过渡。 镜头之间可能需要一些风格化的效果,这些效果应该在合成时完成。
-
Continuity. It is easy to lose track on a feature and any colorimetric discrepancies should be fixed in compositing. Or during the Digital Intermediate (DI).
连续性。 很容易丢失对某一特征的跟踪,任何色度差异都应在合成过程中修复。或者在数字中间片(DI ) 期间。
在 3D 中我们“不应该”做的事情 What we “SHOULD not” do in 3d
-
Animated lights. Any source of light with animated exposure or color during the shot should be kept as an LPE. I can guarantee this : there will be animation notes until final delivery. It is a safety net. There’s no contest here.
动画灯光。 拍摄期间任何具有动画曝光或颜色的光源都应保留为 LPE。我可以保证:直到最终交付时都会有动画说明。 这是一个安全网。这里没有竞争。
-
Delivery. If you work in an ACES workflow, you may want to deliver in ACES2065-1 (AP0) which is not recommended directly from the render engine.
交付。 如果您使用ACES工作流程,您可能希望使用ACES2065-1 (AP0) 进行交付,但不建议直接从渲染引擎进行交付。
-
Merging layers. If you are rendering separated passes, like beauty, haze and volumetric, you’ll obviously need a compositing software to merge them back together. Even if Katana or Guerilla have this feature.
合并图层。 如果您要渲染分离的通道,如美感、雾度和体积,您显然需要一个合成软件将它们合并在一起。即使Katana或Guerilla有此功能。
-
Expensive processes. In some render engines like Arnold, depth-of-field (DOF) or denoising can be expensive and it may be cheaper to run them in comp, although it is debatable.
昂贵的过程。 在某些渲染引擎(如Arnold) 中,景深 (DOF) 或去噪可能非常昂贵,在 comp 中运行它们可能更便宜,尽管这有争议。
-
Lens effect. Chromatic aberration, lens distortion, lens breathing, glow and flares are (almost) never rendered in 3d.
镜头效果。 色差、镜头失真、镜头呼吸、辉光和眩光几乎从不会在 3D 中呈现。
All these choices really depend on budget, time and culture.
所有这些选择实际上都取决于预算、时间和文化。
I would like to add that 3d DOF can be a time and money saver. If the DOF is set in layout, like on Lego Batman, it can save tons of work for other departments. You don’t spend any time or energy in set dressing or animation when elements are out-of-focus.
我想补充一点,3D DOF 可以节省时间和金钱。 如果 DOF 是在布局中设置的,就像乐高蝙蝠侠 一样,它可以为其他部门节省大量工作。当元素失焦时,您无需花费任何时间或精力进行布景或动画制作。
风格选择 Stylistic choices
This is probably the best reason to use any kind of compositing in a full CG movie. Granted, with LUTs, modern render engines can do pretty much anything.
这可能是在完整的 CG 电影中使用任何类型合成的最佳理由。当然,有了 LUT,现代渲染引擎几乎可以做任何事情。
In modern digital times, many people think of the compositing phase as what the developing of an image used to be, back in the film days where you used chemicals to reveal the image on tape.
在现代数字时代,许多人认为合成阶段就像过去的图像显影一样,就像胶片时代使用化学品在磁带上显示图像一样。
胶片冲洗 Film developing
The beauty of this process was the fact that the technique of film development was so refined, you could have your own recipe to make the final image stylized and expressive in your own personal way.
这一过程的美妙之处在于,胶片冲洗技术非常精湛,你可以拥有自己的秘诀,让最终的图像以你自己的方式风格化、富有表现力。
For example in Seven (Director : David Fincher, DP : Darius Khondji), they used different metals (silver being one of them) in the mix to make the black tones of the image extra deep and gritty. This process is known as Bleach bypass.
例如在*《七宗罪》* (导演:大卫·芬奇,摄影指导:达利斯·康吉)中,他们混合使用了不同的金属(银是其中之一),使图像的黑色调格外深沉和粗糙。这个过程被称为漂白效果。
Now if we want to trace parallels between traditional film making and computer graphics, we have on one hand the shooting, which would be the rendering and on the other hand, the development, which would be the compositing. There is an art form in both, slightly different but pretty much the same in their fundamentals.
现在,如果我们要追溯传统电影制作和计算机图形学之间的相似之处,一方面是拍摄,也就是渲染,另一方面是开发,也就是合成。两者都是一种艺术形式,虽然略有不同,但其基本原理基本相同。
沉重的外表 Heavy looks
Now, while adjusting color and contrast is quite common for a compositing task, it’s rather on the subtle spectrum of image stylizing. Although there are some more extreme effects which can only be achieved in comp.
现在,虽然调整颜色和对比度对于合成任务来说相当常见,但它更像是一种微妙的图像风格化。尽管有些更极端的效果只能在合成中实现。
For example, 300 (Director : Zack Snyder, Art director : Grant Freckelton) or Sin City (Director and Cinematography : Robert Rodriguez). And of course Spider-Man : into the Spider-Verse (Directors : Bob Persichetti, Peter Ramsey and Rodney Rothman).
例如*《300勇士》* (导演:扎克·施奈德,艺术总监:格兰特·弗雷克尔顿)或*《罪恶之城》* (导演兼摄影师:罗伯特·罗德里格兹)。当然还有*《蜘蛛侠:平行宇宙》* (导演:鲍勃·佩尔西切蒂、彼得·拉姆齐和罗德尼·罗斯曼)。
I haven’t worked on any stylized movie like the ones listed above but for a PBR cartoon movie, my best results have always been when my render view was as close as possible to the final result.
我没有制作过任何像上面列出的风格化电影,但对于 PBR 卡通电影,我的最佳效果始终是我的渲染视图尽可能接近最终结果。
原始照明? Raw lighting ?
Many supervisors like when the lighting is less contrasted than the final result. It can help for sampling, render times and add some flexibility later in compositing. It is a production choice and it depends on your look. Compositing has this great advantage of being flexible and 3D rendering can be expensive. So rather than being dogmatic, we should adapt to our production constraints, especially if the director is rather uncertain about the look.
许多主管喜欢灯光对比度低于最终结果。这可以帮助采样、渲染时间,并在后期合成时增加一些灵活性。这是一个制作选择,取决于您的外观。 合成具有灵活性的一大优势,而 3D 渲染可能很昂贵。因此,我们不应该教条主义,而应该适应我们的制作限制,特别是当导演对外观相当不确定时。
As a lighting artist I do not want to guess what the final result will be. What I see in my Render View is what I get. This allows me to push my lighting as best as I can. Only rule : make sure to have enough range in your render.
作为一名灯光艺术家,我不想猜测最终结果会是什么。我在渲染视图中看到的就是我得到的。 这使我能够尽可能地推动我的照明。唯一的规则:确保渲染中有足够的范围。
I clearly remember Pascal or Craig doing the Quality Check (QC) of our renders. They would increase and decrease by five stops or even play with the gamma to check the range. That is the most important thing : to have enough range !
我清楚地记得 Pascal 或 Craig 对我们的渲染进行质量检查 (QC)。他们会增加或减少五档,甚至使用伽马来检查范围。这是最重要的事情:要有足够的范围!
Many lighting artists make this comparison with photography : we shoot/render in raw/flat and we give the filmic look in post. That is not my personal belief. Nonetheless I do agree that each stage of a movie production should be an improvement of the previous one. And it is definitely the case for compositing.
许多灯光艺术家将其与摄影进行比较:我们以原始/平面形式拍摄/渲染,并在后期制作中呈现电影效果。这不是我个人的看法。尽管如此,我确实同意电影制作的每个阶段都应该比前一个阶段有所改进。合成肯定也是如此。
生产实例 Production examples
乐高蝙蝠侠的深度运用 Depth usage on Lego Batman
Gotham City in flames just looks great in the following shots. Most of its visual design has been achieved in compositing. It would have been pretty much impossible to reach in 3d. Maybe with a volumetric box and some incandescence, but render times would have been crazy.
火光冲天的哥谭市在以下镜头中看起 来棒极了。它的大部分视觉设计都是在合成中实现的。这在 3D 中几乎是不可能实现的。也许可以用体积盒和一些白炽灯来实现,但渲染时间会非常长。
Gotham City just looks amazing.
哥谭市看上去棒极了。
动画灯光 Animated lights
Here is a very interesting example of LPE animation. Grant wanted to play the silhouette at the end of the shot to accentuate the line of dialog “Batman works alone“. The lighting artist actually turned off the warm key light from the beginning of the shot to emphasize the silhouette. Very bold choice ! I have never seen anything quite like it !
这是一个非常有趣的 LPE 动画示例。格兰特想在镜头结束时播放剪影,以强调“蝙蝠侠独自工作”这句对话。灯光师实际上从镜头一开始就关闭了暖色调的主光,以强调剪影。非常大胆的选择!我从未见过这样的事情!
Silhouette and complementary scheme.
轮廓和互补方案。
Playmobil 上的皮肤脱落 Skin despill on Playmobil
Once again we are back to the green color issue. On Playmobil, we had a sequence happening with plenty of grass which was bouncing a great amount of green color on the character’s faces. We thought the best decision was to fix the skin tones like in VFX.
我们又回到了绿色问题。在Playmobil上,我们有一个场景,有很多草,在角色的脸上反射了大量的绿色。我们认为最好的决定是像在 VFX 中一样修复肤色。
Use of compositing was minimalist on this movie.
这部电影对合成技术的运用非常简单。
This technique called Green Screen Despill is very common in VFX because of green screens. In a live-action film, you not only have to remove the green screen from the plate but also have to take care of the green bleeding on the skin tones. We generally use a Hue Correct for this task.
这种称为“绿屏溢色” 的技术在 VFX 中非常常见,因为绿屏的存在。在真人电影中,您不仅要从底片上取下绿屏,还要处理肤色上的绿色渗色。我们通常使用色相校正来完成这项任务。
乐高蝙蝠侠上的卡片投影 Card projection on Lego Batman
One of my last shots on Lego Batman. We were in crunch time and had to deliver renders pretty fast. When I was lighting it, the NO MORE CRIME sequence was not ready yet.
这是我为乐高蝙蝠侠 拍摄的最后一张照片。我们正处于关键时刻,必须非常快地交付渲染图。当我为它打光时,NO MORE CRIME序列尚未准备好。
Buildings in the far background were also placed in Nuke.
远处背景中的建筑物也被放置在 Nuke 中。
Best decision was to integrate it in compositing. I had to place the card carefully to match the screen geometry location for stereo. I used the point visualization in Nuke to get it accurately. Otherwise I would just have been guessing.
最好的决定是将其集成到合成中。我必须小心地放置卡以匹配立体的屏幕几何位置。我使用 Nuke 中的点可视化来准确获取它。否则我就只能猜测了。
《爱宠大机密》中的 ST 地图 ST map on The secret life of pets
Mapping screens is a very common example in 3d and most of the time image sequences are a pain to render in 3d. You generally have to :
映射屏幕是 3D 中非常常见的例子,大多数时候图像序列在 3D 中渲染起来很麻烦。您通常必须:
-
Find the correct formula to make it work : “_%d”, “_$03f”, “_####”… You never really know.
找到正确的公式使其发挥作用:“%d”、“$03f”、“_####”……你永远不知道。
-
Offset the sequence as it never starts at the right frame.
偏移序列,因为它永远不会从正确的帧开始。
-
Use the right color space : is it in linear ? Is the LUT baked in ?
使用正确的色彩空间:是线性的吗?LUT 是否已嵌入?
-
If the sequence gets updated, you have to render again. Painful.
如果序列更新,则必须再次渲染。很痛苦。
A proper solution is to do all of this in Nuke with a ST Map and a UV pass, like this Times Square’s billboard shot from The Secret Life of Pets (Director : Chris Renaud).
一个合适的解决方案是使用*ST Map和 UV 通道在Nuke*中完成所有这些操作,就像这张从 《宠物的秘密生活》 (导演:Chris Renaud)中拍摄的时代广场广告牌一样。
小黄人身上的热变形 Heat distortion on Minions
Heat distortion is actually quite common. It happens at least on a couple of sequences per movie : it can be motivated by a desert, some lava or a motor engine.
热变形其实很常见。每部电影至少会出现几个场景:沙漠、熔岩或发动机都可能引发热变形。
We did the heat distortion in Nuke in this sequence of Minions (Director : Pierre Coffin). It would be impossible to achieve this effect in lighting and really adds something to the sequence I think.
在《小黄人》 (导演:皮埃尔·科芬)的这个片段中,我们在核弹中实现了热变形。在灯光下不可能实现这种效果,我认为它确实为这个片段增添了一些东西。
There are some great tutorials out there for you to check.
这里有一些很棒的教程供您查看。
我们没有时间在 3D 中做什么 What we do not have time to do in 3d
-
If you cannot re-render. That is probably the main reason to do compositing. Rendering takes time and you may not be able to afford to render more than a couple of iterations. Last minute notes during crunch time should be done in Nuke.
如果您无法重新渲染。 这可能是进行合成的主要原因。渲染需要时间,您可能无法承受超过几次迭代的渲染。关键时刻的最后一分钟笔记应该在Nuke中完成。
-
Quick tests. Rendering can be very long, even interactively. A process I have seen since Planet 51 (Director : Jorge Blanco, Lighting : Barbara Meyers) would be to render the lights separately and play with them in Nuke. Animation aesthetics are usually stylized, and as such, it requires quite some exploring until the right look is found. For quick turn around and several iterations of experimental features, the compositing software provides an invaluable tool.
快速测试。渲染可能非常长,即使是交互式的。自Planet 51(导演:Jorge Blanco,灯光:Barbara Meyers)以来,我看到的一个过程是单独渲染灯光并在 Nuke 中处理它们。动画美学通常是风格化的,因此,需要进行相当多的探索才能找到合适的外观。对于快速周转和多次迭代实验功能,合成软件提供了一个非常宝贵的工具。
-
Uncertain directors. Compositing gives flexibility with clients and directors who are indecisive and it may just save your production.
不确定的导演。 合成可以为犹豫不决的客户和导演提供灵活性,甚至可能挽救您的作品。
-
Production constraints. I really want to emphasize this : comp can save your show since it is really fast to do corrections.
制作限制。 我真的想强调这一点:comp 可以拯救你的节目,因为它可以非常快地进行修正。
生产实例 Production examples
乐高蝙蝠侠上的核弹投影 Nuke projection on Lego Batman
I had to tackle a couple of last minute notes in compositing in the next shot :
在下一个镜头的合成中,我必须处理几个最后一刻的注意事项:
- Smoke at the beginning of the shot was shifted towards blue in Nuke for continuity purposes.
- 为了保持连续性,在Nuke中,镜头开始时的烟雾被移至蓝色。
- At the end of the shot, the sun and its reflection in the water were also added in compositing.
- 在镜头的最后,太阳和它在水中的倒影也被添加到合成中。
Two render layers in this shot : beauty and volumetric.
这张照片中有两个渲染层:美观和体积。
It would have been difficult and time consuming to achieve these effects in 3d and the shot was already rendered in stereo anyway. Sometimes the shorter path is the right one. Just deliver !
在 3D 中实现这些效果会很困难且耗时,而且镜头本来就已经以立体方式渲染了。有时较短的路径是正确的。只需交付!
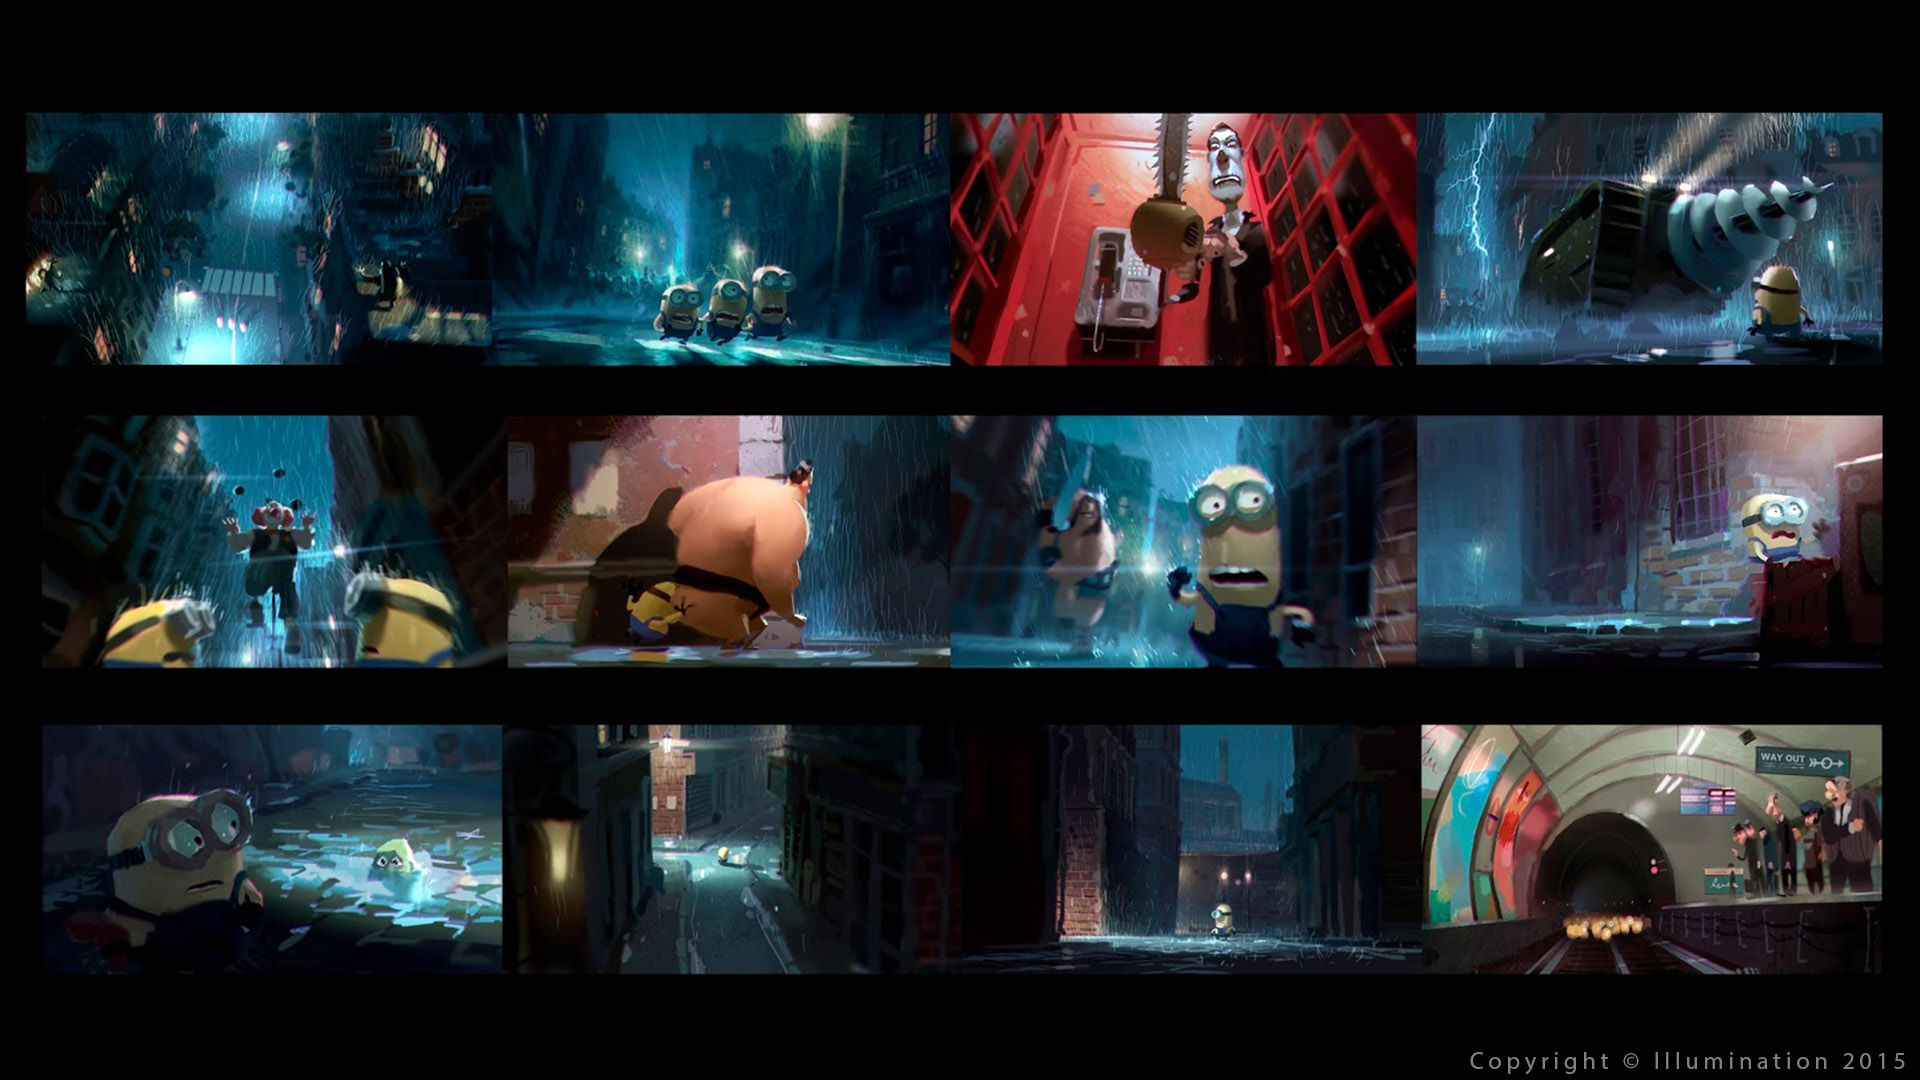
小黄人电影的夜班 Night shift on the Minions movie
I have picked our next example from the Minions movie (Director : Pierre Coffin, Lighting : Nicolas Brack). We lit the following night sequence quite realistically using warm street lights as our main source. Unfortunately, a “change” in art direction occurred and the whole sequence was already rendered. A blue grade was applied to get closer to the original intention.
我从电影《小黄人》 (导演:皮埃尔·科芬,灯光:尼古拉斯·布拉克)中选取了下一个例子。我们使用暖色路灯作为主要光源,非常逼真地照亮了以下夜间场景。不幸的是,艺术指导发生了“变化”,整个场景已经渲染完毕。 应用了蓝色等级以更接近原始意图。


This was my last shot on Minions. It got modified once I was on holidays.
这是我拍摄《小黄人》的最后一张照片。我休假的时候对它进行了修改。
Based on my memories, I have tried to reverse back the shot to its original state with the street lights being warmer. For the record color keys from Clément Griselain were indeed blue.
根据我的记忆,我尝试将镜头倒回到原来的状态,让路灯的颜色更暖。据记录, Clément Griselain 的色调确实是蓝色的。
核弹脚本 Nuke scripts
Nuke scripts on a Full CG PBR movie do NOT have to be complicated. There is a strong belief that complicated setups are just better, like they have been done by geniuses or comp masters. And these scripts, for some reason, they just impress people. I personally think the contrary : I am much more impressed by simple setups. So please, do NOT make your nuke script look like this :
全 CG PBR 电影中的核脚本不必太复杂。人们坚信复杂的设置更好,就像天才或计算机大师完成的那样。而这些脚本,出于某种原因,它们给人留下了深刻的印象。我个人认为恰恰相反:简单的设置给我留下了更深刻的印象。 所以请不要让你的核脚本看起来像这样:

Maybe the artist was in a rush and did not have time to clean his script. I am not here to judge.
也许艺术家当时很匆忙,没有时间整理剧本。我无意评判。
On many shows, I have opened nuke scripts that looked like spider webs. I really felt like it was a complete waste of time and I sometimes wondered if the artist knew what he was doing. Many times I had to clean the script myself and ended up turning off 90% of the nodes. In my experience, it has ALWAYS looked better after the cleaning. Some artists just add color correctors one after another without checking. Sometimes these nodes just cancel each other. It is crazy.
在许多节目中,我打开的核脚本看起来像蜘蛛网一样。我真的觉得这完全是在浪费时间,有时我甚至怀疑艺术家是否知道自己在做什么。很多时候我不得不自己清理脚本,最后关掉了 90% 的节点。根据我的经验,清理后效果总是会更好。 有些艺术家只是接二连三地添加色彩校正器,而没有检查。有时这些节点会相互抵消。这太疯狂了。
Alex Fry, compositing supervisor at Animal Logic, probably one of the best artist and technician I have ever met, once told me about compositing : “The more you cheat, the more it will feel cheated.”
Animal Logic 的合成主管 Alex Fry 可能是我见过的最优秀的艺术家和技术人员之一,他曾经这样跟我谈论合成:“你作弊越多,你就越有被作弊的感觉。”
I completely agree with him.
我完全同意他的观点。
综合最佳实践 Compositing good practices
线性合成 Linear Compositing
Just like rendering, compositing should be done in linear. Cinematic Color explains pretty well what best practices are.
就像渲染一样,合成也应该以线性方式进行。Cinematic Color 很好地解释了最佳实践是什么。
The benefits of scene-linear compositing are numerous; similar to the benefits found in rendering, shading and lighting. All operations which blend energy with spatially neighboring pixels (motion blur, defocus, image distortion, resizing, etc) have more physically plausible (aka realistic) results by default. Anti-aliasing works better, light mixing preserves the appearance of the original renders and most importantly, even simple compositing operations such as “over” produce more realistic results, particularly on semi-transparent elements (hair, volumetrics, fx elements, etc).
场景线性合成的好处很多;类似于渲染、着色和照明中的好处。默认情况下,所有将能量与空间相邻像素混合的操作(运动模糊、散焦、图像失真、调整大小等)都会产生更符合物理原理(即更逼真)的结果。抗锯齿效果更好,光线混合保留了原始渲染的外观,最重要的是,即使是简单的合成操作(例如“over”)也能产生更逼真的结果,尤其是在半透明元素(头发、体积、fx 元素等)上。
评分和记录 Grading and Log
I clearly remember that it was forbidden to use the Nuke saturation node onLego Batman. We had our own grading node and I was not sure why. After reading Cinematic Color and this brilliant post on the acescentral forum, I finally understood the reason : some grading operations behave better with a logarithmic transfer function.
我清楚地记得,在 《乐高蝙蝠侠》中禁止使用 Nuke 饱和度节点。 我们有自己的分级节点,但我不知道为什么。在阅读了Cinematic Color和acescentral论坛上的这篇精彩帖子后,我终于明白了原因:某些分级操作在使用对数传递函数时效果更好。
It is absolutely essential that good grading practices inherited from colorists make their way to animation studios. I cannot explain the reason any better than Daniele Siragusano, so let’s just quote him :
动画工作室绝对有必要借鉴调色师的良好调色实践。我无法比**Daniele** **Siragusano**更好地解释原因,所以我们就引用他的话吧:
The ideal space for an operation depends on what you want to simulate. If you are after modelling physical phenomena, then some sort of scene linear is probably the right domain. If you want to model perceptual phenomena, then typically a perceptual space (like a quasi-log or opponent space) is the right thing.
操作的理想空间取决于您想要模拟的内容。 如果您想要模拟物理现象,那么某种场景线性可能是正确的领域。如果您想要模拟感知现象,那么通常感知空间(如准对数或对手空间)是正确的选择。
You may have noticed that Resolve does it by default (in Project Settings ->Color Management ->Color science) but Nuke doesn’t. It is probably because most of the compositing operations such as merging layers, depth-of-field and lens effects should be done in “linear”.
您可能已经注意到,Resolve默认会执行此操作(在 “项目设置”->“颜色管理”->“颜色科学” 中),但Nuke不会。这可能是因为大多数合成操作(例如合并图层、景深和镜头效果)应该以“线性”方式完成。
Here is an example of grading on a linear exr from Cloudy with a chance of meatballs (Directors : Phil Lord and Christopher Miller) :
以下是《天降美食》中可能出现肉丸的线性 exr分级示例(导演:Phil Lord和Christopher Miller):


Saturating with a logarithmic transfer function is quite common for colorists.
对于调色师来说,使用对数传递函数进行饱和是很常见的。
The main issue we are facing here is that Nuke is not a grading software, contrary to Resole or Baselight. So we are doing stuff here that is a bit against its nature. Something worth mentioning is that the current trend is about color space aware tools, like in Resolve 17.
我们面临的主要问题是,与 Resole 或Baselight相反,Nuke 不是调色软件。所以我们在这里做的事情有点违背它的本质。值得一提的是,目前的趋势是色彩空间感知工具,比如 Resolve 17。
哪个工作空间? Which working space ?
The very notion of “working space” is slowly becoming obsolete, which I find fascinating. I can only quote Daniele Siragusano with this very interesting comment :
“工作空间”这个概念本身正在逐渐过时,我觉得这很有趣。我只能引用 Daniele Siragusano 的这句非常有趣的评论:
The same is true for a unified working space. Why should we do all operations in ACEScct ? Maybe I want to do a CAT in LMS, a photoshop blend mode in another space and then a saturation operation in a CAM-ish space. In the mid-term future, the concept of aworking spacewill be obsolete.
统一工作空间也是如此。为什么我们要在 ACEScct 中执行所有操作?也许我想在 LMS 中执行 CAT,在另一个空间中执行 photoshop 混合模式,然后在 CAM-ish 空间中执行饱和操作。在中期未来,工作空间的概念将会过时。
So, we may certainly pick the radiometric domain to perform an exposure adjustment, another domain to perform a “sharpen” and some other one to add or remove saturation. As Daniele explained above, it really depends on what you want to achieve. Baselight has eight different ways to modify saturation and I agree that saturating in ACEScct may not be ideal in some cases, especially with red tones.
因此,我们当然可以选择辐射域来执行曝光调整,另一个域来执行“锐化”,另一个域来添加或删除饱和度。正如 Daniele 上面解释的那样,这实际上取决于您想要实现的目标。 Baselight有八种不同的方法来修改饱和度,我同意 ACEScct 中的饱和度在某些情况下可能并不理想,尤其是红色调。
As a friendly reminder, I would list these three advices :
为了提醒大家,我列出以下三条建议:
- As always, best is to try for yourself and see what suits best your needs.
- 与往常一样,最好的方法是亲自尝试,看看什么最适合您的需求。
- You should not “force yourself” into a grading workflow because of what I wrote.
- 您不应该因为我所写的内容而“强迫自己”进入评分工作流程。
- The important thing is to be comfortable with your own workflow and understand the ins and outs.
- 重要的是,你要熟悉自己的工作流程,并了解其中的细节。
Nuke 中的光辉 Glow in Nuke
It was actually the same thing with the Nuke glow on Lego Batman. Completely forbidden to use the native glow from Nuke. It just looks cheap and wrong.
这实际上和乐高蝙蝠侠 的核辐射是一样的。完全禁止使用核辐射的原生辐射。它看起来很廉价,而且不合适。


Using Nuke’s native glow should be forbidden. Really.
应该禁止使用 Nuke 的原生光辉。真的。
If you develop a library for your lens effects, vignettes and grading nodes; and make them available through gizmos, you will achieve consistency.
如果您为镜头效果、晕影和分级节点开发一个库;并通过小装置提供它们,您将实现一致性。
曝光控制 Exposure Control
Exposure is not something to take slightly. It has a huge impact on our renders for post-process operations such as anti-aliasing, denoise or glow. Here is a list of tricks to test your exposure range.
曝光不是可以小题大做的事情。 它对我们的渲染后期处理操作(如抗锯齿、去噪或发光)有很大影响。以下是测试曝光范围的技巧列表。
通过镜头效果控制曝光 Exposure control by Lens effect
Use a “Gotham Lens Node** ” on your render. Have you read this brilliant article about the Gotham Procedural Lens Flares ? I had the chance to use this node designed by Alex Fry on Lego Batman and it is the BEST one I have ever seen.
在渲染中使用“Gotham Lens Node** ”。你读过这篇关于 Gotham Procedural Lens Flares 的精彩文章吗?我有机会在Lego Batman上使用**Alex Fry设计的这个节点,这是我见过的最好的节点。**
What is a lens node supposed to do ? Most of the things from a camera lens :
镜头节点的作用是什么? 相机镜头的大部分功能如下:
-
Camera Vertical Blur 相机垂直模糊
On Lego Batman, I never tweaked nor modified the node. The Lens Node did not have any exposed parameter anyway : it was just a node you would put at the end of your Nuke tree and connect your shot’s camera to it.
在《乐高蝙蝠侠》中,我从未调整或修改过节点。 无论如何,镜头节点没有任何公开的参数:它只是一个放在 Nuke 树末端并将镜头的相机连接到它的节点。
If my shot did not have enough glow nor flare in the shot, it would mean that there was not enough energy in my lighting. Basically we used the node as an Exposure and Energy check. I personally think this is genius.
如果我的镜头中没有足够的光晕或眩光,则意味着我的灯光能量不足。 基本上,我们使用节点作为曝光和能量检查。我个人认为这是天才之举。
Don’t arbitrarily tweak the glow, tweak your light’s exposure instead. It does not make sense to tweak the intensity, color or saturation of a glow on every single shot of a movie. It is pretty much incorrect and very time consuming.
不要随意调整光晕,而是调整灯光的曝光度。 在电影的每个镜头中调整光晕的强度、颜色或饱和度是没有意义的。这几乎是错误的,而且非常耗时。
Glow should never be applied through a mask. A glow and other camera lens effects are applied on the whole image like in real life : All parts of Gotham Lens operate linearly on all values in the image, without any keys or clips. I think we used the Gotham Lens Effect without any tweaking on 90% of the shots of Lego Batman. We only tweaked the node for storytelling purpose.
绝不应该通过遮罩应用光晕。光晕和其他相机镜头效果会像在现实生活中一样应用于整个图像:Gotham Lens 的所有部分都对图像中的所有值进行线性操作,没有任何键或剪辑。 我认为我们在 90% 的乐高蝙蝠侠镜头上使用了 Gotham Lens Effect,没有进行任何调整。我们只是为了讲故事而调整了节点。
乐高蝙蝠侠示例 Lego Batman example
It is a win-win for everybody : supervisors are happy because they have a proper way to check the render exposure and artists are happy because they do not fiddle around their glow. If you are short on time (and we always are !) lens nodes will guarantee a correct amount of glow on your shots in no time. I cannot resist the urge to share with you this video from fx guide :
这对每个人来说都是双赢的:主管很高兴,因为他们有合适的方法来检查渲染曝光度,艺术家也很高兴,因为他们不用再摆弄他们的光晕了。如果你时间紧迫(我们总是这样!)镜头节点将保证你的镜头在短时间内获得正确的光晕量。我忍不住想和你分享这个来自fx guide的视频:
Warner Bros. Pictures and Warner Animation Group, in association with LEGO System A/S, a Lin Pictures / Lord Miller / Vertigo Entertainment production
华纳兄弟影业和华纳动画集团与 LEGO System A/S 联合出品,由 Lin Pictures / Lord Miller / Vertigo Entertainment 出品
I actually wrote to Alex to ask him a bit on the conception of this node. I was eager to know if there was a scientific approach to the node. Can you calculate the amount of glow on a specific value of pixel or is it mostly a visual approach ? Here is his answer :
我实际上写信给Alex,向他询问了这个节点的概念。我很想知道是否有科学的方法来实现这个节点。你能计算出特定像素值的发光量吗?还是主要是视觉方法?以下是他的回答:
Alex Fry : Just a lot of tweaking. Through first few weeks of it being used in production I was in dailies, paying attention to any of the shot comments that had anything to do with the lens, and tweaking values till I found the middle ground that produced the least notes. There were no if/or conditions, or anything driven by thresholds, it was all completely linear.
After a while the balance was found, and it generally didn’t need to be touched by artists. (There were still some exceptions though).Alex Fry:只是进行了很多调整。在投入制作的最初几周里,我一直在关注与镜头有关的任何镜头评论,并调整值,直到找到产生最少注释的中间值。没有 if/or 条件,也没有任何由阈值驱动的东西,一切都是完全线性的。
过了一段时间,平衡就找到了,而且通常不需要艺术家来触及它。(不过还是有一些例外)。
曝光和夹紧示例 Exposure and clamping example
Let’s take a simple example :
让我们举一个简单的例子:


I generally use simple examples for clarity.
为了清楚起见,我一般使用简单的例子。
This is why clamping our renders can be issue. Because you will be losing the ratio between Red, Green and Blue. So instead of having a nice warm blooming effect, the clamping makes it desaturated.
这就是为什么限制我们的渲染可能会有问题。因为您将失去红色、绿色和蓝色之间的比例。因此,限制会使它失去饱和度,而不是产生漂亮的暖色绽放效果。
Last thing about the lens node, it is not available as it is property of Animal Logic. But you can totally do your own. Alex gives us some clues in the article “ […] using raw Nuke nodes, really just an exotic combination of Convolves, Blurs, Transforms and Vector warps.”
关于镜头节点的最后一件事,由于它是 Animal Logic 的财产,因此不可用。但你完全可以自己做。Alex在文章“ […] 使用原始 Nuke 节点,实际上只是卷积、模糊、变换和矢量扭曲的奇特组合”中给了我们一些线索。
We had some issues doing lens distortion in 3d on Lego Batman but it got fixed during production by the developers. And I recently read this paper from Animal about 3d lens flares on Lego 2 ! Mind-blowing !
我们在制作 《乐高蝙蝠侠》 的 3D 镜头失真时遇到了一些问题,但开发人员在制作过程中修复了这个问题。我最近读了Animal 的这篇关于《乐高 2》的 3D 镜头眩光的论文!令人震惊!
通过 DOF 控制曝光 Exposure control by DOF
There is another solution to control the energy of your render and that’s depth-of-field. We noticed it on Playmobiland it is confirmed by Jeremy Selan in Cinematic Color.
还有另一种控制渲染能量的解决方案,那就是景深。我们在Playmobil上注意到了这一点, Jeremy Selan在Cinematic Color中也证实了这一点。


Great example from Cinematic Color.
来自电影色彩 (Cinematic Color) 的绝佳示例。
Otherwise, you can also :
否则,您也可以:
-
Play with the exposure in Nuke or RV. What happens if you decrease the exposure by 5 stops ? What is the brightest pixel of your render ?
在 Nuke 或 RV 中调整曝光。 如果将曝光度降低 5 级会发生什么?渲染中最亮的像素是什么?
-
Do not hesitate tolook at the luminance channel of your render. Color definitely messes with our perception. Just get rid of it !
不要犹豫,看看渲染的亮度通道。 颜色肯定会扰乱我们的感知。把它去掉吧!
-
I also sometimessquint my eyes. It will help you to better see the contrast.
我有时也会眯起眼睛。 这样能帮助你更好地看到对比。
-
Or look at your shot in thumbnail mode. A smaller scale will help to focus on the bigger picture.
或者以缩略图模式查看您的照片。 较小的比例将有助于聚焦更大的画面。
-
And finally you mayflip your render. Desperate times call for desperate measures.
最后,你可以翻转渲染。 危急时刻,必须采取紧急措施。
唯一的规则 The only rule
I have been thinking a lot on the relationship between lighting and compositing and their responsibilities. The only rule I could come with is : lighting and compositing must go in the same direction, not fight against each other. You need to make sure that your lighting and your compositing are CONSISTENT. Don’t make your characters darker in Guerilla to finally make them brighter in Nuke. Rolling back the values from your Nuke script to your render engine will always help.
我一直在思考照明和合成之间的关系以及它们各自的职责。我能想到的唯一规则是:照明和合成必须朝着同一个方向发展,而不是互相冲突。 你需要确保你的照明和合成是一致的。 不要让你的角色在 Guerilla 中变暗,最后在 Nuke 中变亮。将 Nuke 脚本中的值回滚到渲染引擎总是有帮助的。
On Lego Batman, most of my compositing scripts would look like this : volumetric over Beauty + Lens effect ! I tried really hard to nail most of my look in CG.
在 《乐高蝙蝠侠》 中,我的大部分合成脚本看起来都是这样的:体积叠加在美感 + 镜头效果上!我非常努力地在 CG 中完成大部分外观。
Barbara Meyers, lighting supervisor on Planet 51, used to tell me : “You should push your lighting as far as you can. Go as close as you can to the final result in lighting”.
Planet 51 的灯光主管Barbara Meyers曾经告诉我:“你应该尽可能地发挥灯光的作用。让灯光尽可能接近最终效果。”
Funnily enough, ten years later, I did the exact same thing on Lego Batman. From Maya directly to DI (on a couple of shots) !
有趣的是,十年后,我在《乐高蝙蝠侠》上做了同样的事情。从 Maya 直接到 DI(在几个镜头上)!

It’s kind of a challenge, really.
这确实是一种挑战。
You can actually achieve that when you have a great render engine, some good-looking assets and a solid validation process. Fortunately, we had these three things on Lego Batman. Without Glimpse, Grant and Craig, it would not have been possible to do it this way.
如果你拥有出色的渲染引擎、一些好看的资产和可靠的验证流程,你实际上可以实现这一点。幸运的是,我们在《乐高蝙蝠侠》中拥有这三样东西。如果没有 Glimpse、Grant 和 Craig,我们就不可能以这种方式做到这一点。
I remember that our TD, Manuel Macha, told me one day : “You use Glimpse as it was designed to.” So I guess Lego Batman was meant for this kind of process and I am not saying this approach should be applied blindly on EVERY production. But it is worth thinking about it and asking ourselves : what do I want to do in compositing ?
我记得我们的 TD Manuel Macha 有一天告诉我:“你可以按照 Glimpse 的设计来使用它。”所以我猜想乐高蝙蝠侠就是为这种流程而设计的,我并不是说这种方法应该盲目地应用于每一个作品。但值得思考并问自己:我想在合成中做什么?
数字中间片 (DI) Digital Intermediate (DI)
I really want to make it clear : Lego Batman was done with a big budget, surfacing was close to perfection (only one plastic shader may help), Glimpse was just fantastic in his look and artistic direction was consistent (no last-minute changes) ! This happens very rarely. It would be a mistake to apply this process on a small budget with artistic uncertainties.
我真的想说清楚:乐高蝙蝠侠的制作预算很大,表面处理近乎完美(只有一个塑料着色器可能有帮助),Glimpse 的外观非常棒,艺术指导也始终如一(没有最后一刻的更改)!这种情况很少发生。在预算有限且艺术不确定的情况下应用此流程将是一个错误。
Digital intermediate is a motion picture finishing process which classically involves digitizing a motion picture and manipulating the color and other image characteristics.
Animal Logic also has a another advantage : Digital Intermediate is in-house. And this makes a big difference ! I sometimes feel that part of the traditional compositing work on Lego Batman (like restoring natural colors to the characters) was actually done in DI.
Animal Logic 还有另一个优势:数字中间片是内部的。这有很大的不同!我有时觉得《乐高蝙蝠侠》的部分传统合成工作(如恢复角色的自然色彩)实际上是在 DI 中完成的。
It is like if each step was shifted in a way : lighting was done in Nuke using LPE and compositing was done in DI using AOVs. I thought this workflow was quite interesting and new.
就好像每个步骤都以某种方式转移了:照明是在 Nuke 中使用 LPE 完成的,合成是在 DI 中使用 AOV 完成的。我认为这个工作流程非常有趣和新颖。
If you are laying the groundwork for a sequence, it’s really not a good idea to start with heavy tweaks in comp. Especially because we’re still in the lightingprocess ! So avoid it at all cost at this stage at least.
如果你正在为一个序列打下基础,那么一开始就进行大量调整确实不是一个好主意。尤其是因为我们仍然处于照明过程中!所以至少在这个阶段要不惜一切代价避免它。
合成约束 Compositing constraints
I had both experiences : I have seen compositing artists saving sequences and some destroying them. It actually depends on numerous factors.
我有过这两种经历:我见过合成艺术家保存序列,也见过有人毁掉它们。这实际上取决于许多因素。
According to a friend of mine who is a Compositing Supervisor, here is an interesting guideline :
据我的一位合成主管朋友说,这里有一个有趣的指导方针:
When reviewing a compositing shot, first thing to check should be its adequacy with the lighting.
当审查合成镜头时,首先要检查的是其光照是否适宜。
I completely agree on this.
我完全同意这一点。
If the look is massively changed during the compositing phase, it can either be because of :
如果在合成阶段外观发生巨大变化,则可能是因为:
- The lighting sucked or was not respecting continuity. Yes it happens.
- 灯光太差或不尊重连续性。是的,这种情况确实发生。
- There has been a change of art direction. And yes it happens a lot.
- 艺术指导已经改变。是的,这种事经常发生。
It is also true that compositing is probably the most heavily commented process in the whole chain. The reason is pretty simple : there is no department after compositing to fix the image. Because it is the final image, everybody feels legitimate to give their opinion.
合成可能是整个流程中评论最多的过程 , 这也是事实。原因很简单:合成后没有部门来修复图像。因为这是最终图像,所以每个人都觉得有权发表意见。
It is quite common that a compositing artist faces these critics :
合成艺术家面临这些批评是很常见的:
I wish you had put less DOF so we see my set better. Because of vignetting, we do not see the secondary animation I had put in the character’s hand, right next to the screen border. I thought particles would be more visible and present in this shot.
我希望你把景深设置得少一点,这样我们才能更好地看到我的布景。由于晕影,我们看不到我放在角色手上的次级动画,就在屏幕边框旁边。我以为在这个镜头中粒子会更明显、更明显。
All of these comments are ego-related. We are not the directors of the movie and we do not work for our demo reel. Our skills are at the service of the movie. So it is completely necessary to accept that our work will be modified. And not in the way we expected or hoped.
所有这些评论都与自我有关。我们不是电影的导演,我们也不是为了我们的样片而工作。我们的技能是为电影服务的。 因此,完全有必要接受我们的作品将被修改的事实。而且不是以我们预期或希望的方式。
生产实例 Production examples
Shoji 在《大师》中出镜 Shoji screens on The Master
On the short “*The Master*“, we had some walls made of translucent paper, Shōji screens, like in a traditional dojo. One retake we got during review was to make the paper wall brighter. How would you achieve that ?
在短片《*大师*》中,我们用半透明的纸做了一些墙壁,就像传统道场里的屏风一样。我们在审查期间得到的一个重拍是让纸墙更亮。你是如何实现这一点的?
- Lighting ? We could create a light only for the screens. BUT you would have to deal with some light-linking and that would complicate you setup for nothing.
- 照明? 我们可以只为屏幕创建灯光。但您必须处理一些灯光链接,而这会使您的设置变得毫无意义的复杂。
- Compositing ? We could use DeepOpenEXRId to color correct the shoji screens. BUT that would not brighten the Global Illumination nor the reflections. A shame.
- 合成? 我们可以使用DeepOpenEXRId来校正障子屏风的颜色。但这不会使全局照明和反射变亮。真遗憾。
- Surfacing ? We could tweak the shader to add a bit more SSS or brighten a bit the albedo. YES, this seems like a legit way to do it.
- 浮出水面? 我们可以调整着色器以添加更多 SSS 或稍微增加反照率。是的,这似乎是一种合法的方法。


This may seem like a trivial example. But it’s not.
这看上去可能是一个微不足道的例子。但事实并非如此。
It took me 10 seconds to apply the color corrector in Nuke and about 15 minutes to find the right values to match it in Guerilla. I am really not a big fan of comp shenanigans except for quick fixes.
我花了 10 秒钟在 Nuke 中应用颜色校正器,花了大约 15 分钟在 Guerilla 中找到与之匹配的正确值。除了快速修复之外,我真的不喜欢合成恶作剧。
In my personal experience, I have always found the long-term solutions much more rewarding. When you are just piling up small fixes one after another, it will eventually blow in your face. I highly recommend tonail the renders in CG to get proper results.
就我个人经验而言,我始终认为长期解决方案更有价值。当你只是一桩接一桩地堆积小修复时,它最终会给你带来毁灭性的后果。我强烈建议在 CG 中完成渲染以获得正确的结果。
《银翼杀手 2049》的设定延伸 Set extension on Blade Runner 2049
Here is an example of set extension : Blade Runner 2049 (Director : Denis Villeneuve, DP : Roger Deakins). I am amazed on how close the final result is to the actual shoot. That is a complete different approach from *Mad Max : Fury Road*. Here are two articles if you want to read more on the subject.
以下是场景扩展的示例:《银翼杀手 2049》(导演:丹尼斯·维伦纽瓦,摄影指导:**罗杰·迪金斯)。我对最终结果与实际拍摄结果的接近程度感到惊讶。这与《疯狂的麦克斯:狂暴之路》 完全不同。如果您想阅读更多关于这个主题的文章,这里有两篇 文章。


Both frames look so close in terms of look.
从外观上看,这两个框架非常接近。
Sometimes, for artistic, technical or political reasons, you have to split the characters from the background or even the sky, but the idea is the same : simple and efficient.Less human time, more computer time. Let the computer do the heavy work !
有时,出于艺术、技术或政治原因,您必须将人物从背景甚至天空中分离出来,但想法是一样的:简单而高效。减少人力,增加计算机时间。 让计算机完成繁重的工作!
光路表达式 Light Path Expression
Now, this might sound slightly controversial (especially for old timers), but there’s quite a few things done in Nuke that are considered lighting. The most obvious example of this are Light Path Expressions.
现在,这可能听起来有点争议(尤其是对于老手来说),但 Nuke 中有很多东西被认为是照明。 最明显的例子是光路表达式。
I find it quite satisfactory when I render the lights of my shot as LPE and I get to play with them to find the right balance for my lighting. It’s basically baking all of your lighting and bringing them into a software that will give you great flexibility, with great quality and very very fast.
当我将镜头中的灯光渲染为 LPE 时,我发现它非常令人满意,我可以玩弄它们来找到适合我的灯光的平衡。它基本上是烘焙你所有的灯光,并将它们带入一个软件中,这将为你提供极大的灵活性、出色的质量和非常快的速度。
Some scenes on Ninjago were so heavy that I could not render interactively. I would just throw dozens of area lights in some strategic places and render on the farm. Then I would do all the color and exposure work in Nuke.
Ninjago 上的一些场景太过繁重,我无法进行交互式渲染。我只能在一些战略位置投射数十个区域光,然后在农场上进行渲染。然后我会在 Nuke 中完成所有颜色和曝光工作。
Since the arrival of LPE, it has become almost the norm that lighting begins with a basic lighting setup done as quickly as possible, as close as it should be and then balance and search for your look in the comp software. You just have to limit yourself to modify exposure and RGB values, and then you can send those back to your lighting software.
自从 LPE 问世以来,灯光几乎已经成为常态,首先要尽快完成基本灯光设置,尽可能接近实际效果,然后在合成软件中平衡和寻找您想要的外观。您只需限制自己修改曝光和 RGB 值,然后就可以将它们发送回您的灯光软件。

I’m basically doing lighting in real-time.
我基本上是在实时进行照明。
Compositing is the perfect process for templates. The one that makes more sense in my opinion would be with Light Path Expressions (LPE). Therefore you would have the flexibility to adjust the lighting in real-time without breaking any albedo nor GI process.
合成是模板的完美流程。我认为更有意义的是使用光路表达式 (LPE)。因此,您可以灵活地实时调整照明,而不会破坏任何反照率或 GI 流程。
LPE 和 AOV LPE and AOVs
What should we do when an element is lacking specular ? The cleanest and best solution is sending back the asset to surfacing. Problem is, we don’t always have the time to do that.
当元素缺少镜面反射时,我们该怎么办?最干净、最好的解决方案是将资产送回表面。问题是,我们并不总是有时间这样做。
Let’s say in a sequence with 18 shots, all of them look fantastic, but in 3 of them the ground is lacking information in the specular and it looks quite dull and boring due to camera and light angle combination. How can we fix this ?
假设在一个包含 18 个镜头的序列中,所有镜头看起来都很棒,但其中 3 个镜头的地面缺少镜面反射信息,并且由于相机和光线角度组合的原因,地面看起来相当暗淡和无趣。我们该如何解决这个问题?
- Adding a light : this is probably the cleanest solution but you will need a new render.
- 添加灯光: 这可能是最干净的解决方案,但您需要新的渲染。
- Surfacing fix : can either be done by the lighting artist or a surfacing artist. This may require an interaction with the surfacing department, which may cause delays or misunderstandings. You will need a new render as well.
- 表面修复: 可以由灯光师或表面师完成。这可能需要与表面部门进行互动,这可能会导致延误或误解。您还需要新的渲染。
- Specular AOV : sometimes the specular AOV will provide the information you’re missing. I would only use this solution if I cannot render again.
- 镜面反射 AOV: 有时镜面反射 AOV 会提供您缺失的信息。如果我无法再次渲染,我才会使用此解决方案。
If a majority of your shots requires some kind of surface fix, it should totally go back to surfacing. A common mistake is to believe that going back is a waste of money. Until you see a bunch of comp artists trying to color correct several elements between several shots, and struggle in keeping some sort of consistency.
如果你的大部分镜头都需要某种表面修复,那么就应该完全恢复到表面效果。一个常见的错误是认为恢复是浪费钱。直到你看到一群合成艺术家试图在几个镜头之间校正几个元素的颜色,并努力保持某种一致性。
结论 Conclusion
I want to clearly state that I am not against Compositing. It is an amazing tool that has to be used properly. But it is so powerful and so easy to use that it can become quite a dangerous mix. I have seen so many artists tweaking their shots and throwing color corrector after color corrector ! My personal favorite being : grade up, grade down and then grade off to turn off the pass.
我想明确地说明,我并不反对合成 。 它是一种很棒的工具,必须正确使用。但它功能强大且易于使用,因此可能会成为一种相当危险的组合。我见过很多艺术家调整他们的镜头,使用一个又一个的色彩校正器!我个人最喜欢的是:调高、调低,然后关闭调色以关闭通道。
I am not saying that compositing is easy. The tool is probably easier than any 3d package. But its difficulty lies within the subtlety it requires.
我并不是说合成很容易。该工具可能比任何 3D 软件包都容易。但它的难度在于它需要的微妙之处。
I found out in time that the most important thing is the final pixels on screen. I’m a happy spectator when something looks beautiful, meaningful and can’t figure out if the comper used LPEs, AOVs, if surfacing fixed a shot, or two, or none, if the vignette is fake and done with a roto. Why ? Because it was done with taste, consistency and subtlety. And most important of all, to support the story and the emotions on screen.
我及时发现,最重要的是屏幕上的最终像素。当某些东西看起来美丽而有意义时,我会很高兴,并且无法弄清楚合成器是否使用了 LPE、AOV,是否修复了一个镜头、两个镜头或一个镜头都没有,是否小插图是假的并且是用 roto 完成的。为什么?因为它做得很有品味、一致性和微妙性。 最重要的是,它支持了屏幕上的故事和情感。
I’ve seen all kinds of horrors done with all kinds of techniques. I’ve seen compers bury a sequence and I’ve seen incredibly boring renders that were technically correct. So there is no technique that will replace vision, taste, talent, direction and love for the craft.
我见过各种恐怖片,都是用各种技术制作的。我见过合成器埋没了某个片段,也见过技术上无误但极其无聊的渲染。所以,没有任何技术可以取代视野、品味、天赋、方向和对工艺的热爱。
来源 Sources
If you want to dig more on the subject here are some links :
如果你想进一步了解这个主题,这里有一些链接:
-
**Ben Mc Ewan**‘s blog about compositing.
**Ben Mc Ewan**的有关合成的博客。
-
Industrialised Cinematography by Craig Welsh.
克雷格·威尔士 (Craig Welsh) 的工业化电影摄影。
-
Physically based lens flare rendering in “*The Lego Movie 2*“.
-
Bleach bypass definition.
漂白绕过定义。
-
Green Screen Despill technique.
*绿屏消除溢色*技术。
-
ST map technique in Nuke.
Nuke 中的ST 图技术。
-
Clément Griselain‘s blog.
**Clément Griselain**的博客。
-
Alex Fry‘s website (compositing supervisor at Animal Logic).
**Alex Fry**的网站(Animal Logic 的合成主管)。
-
cf_animorph by Chris Fryer
Chris Fryer的cf_animorph
-
Cinematic Color guide. A must-read !
电影色彩指南。必读!
-
Why grading in log instead of linear from ACEScentral.
-
Download link from OCIO website.
-
The batman movie : keeping it real article from fxguide.
蝙蝠侠电影:保持真实,来自 fxguide 的文章。
-
The Cinematography of the Lego Movie by Craig Welsh.
克雷格威尔士的乐高大电影摄影。
-
Digital intermediate definition.
数字中间定义。
-
Motion picture definition.
运动图像清晰度。
-
The LEGO Batman Movie Packs a Punch with FilmLight’s Baselight.
-
DeepOpenEXRId by Mercenaries Engineering.
由 Mercenaries Engineering 开发的DeepOpenEXRId 。
-
BLADE RUNNER 2049: Richard Hoover – VFX Supervisor – Framestore.
-
How the orange haze of Blade Runner 2049’s Las Vegas meant 13 hour renders.
-
Light Path Expressions in Guerilla Render.
Guerilla Render 中的光路表达式。
-
Lego render with no comp… by Steffen Hampel.
无需计算机的乐高渲染...作者:Steffen Hampel。
-
- 介绍 Introduction
- 为什么要做合成? Why doing compositing ?
- 在 3D 中我们“不能”做的事情 What we “cannot” do in 3d
- 在 3D 中我们“不应该”做的事情 What we “SHOULD not” do in 3d
- 风格选择 Stylistic choices
- 生产实例 Production examples
- 我们没有时间在 3D 中做什么 What we do not have time to do in 3d
- 生产实例 Production examples
- 核弹脚本 Nuke scripts
- 综合最佳实践 Compositing good practices
- 曝光控制 Exposure Control
- 唯一的规则 The only rule
- 合成约束 Compositing constraints
- 生产实例 Production examples
- 光路表达式 Light Path Expression
- LPE 和 AOV LPE and AOVs
- 结论 Conclusion
- 来源 Sources
 粤公网安备44060602002818